How to Weave in Ends in Knitting
Weaving in ends is a simple but important step in your knitting! You'll be enjoying your finished projects in no time.
We all know weaving in ends can be tedious, but it's such an important step to take if you want your work to last and an essential skill when learning to knit. In this easy tutorial, you'll learn how to weave in ends of a knitted project the correct way, so you'll be able to enjoy your creation for years to come!
When you bind off that last stitch or sew that last seam, you just want to pull the sweater on and run down the street screaming "YES! I made this!"
But before you leave the house in something that looks unfinished, take a few minutes to weave in your ends. Each time you cast on, bind off, or join another ball you've got ends to weave. How do you weave them without them wanting to unravel immediately? We'll show you how!
Materials List
Scissors
Tapestry Needle
Instructions
-
Cut the tail of your yarn so that you have a strand that's about 4-6" long.
This will give you a piece of yarn that's long enough to weave in so that it doesn't slip out of the eye of the needle but short enough that you won't have to pull a huge length of yarn through each stitch, either. -
Thread the eye of your tapestry needle.
-
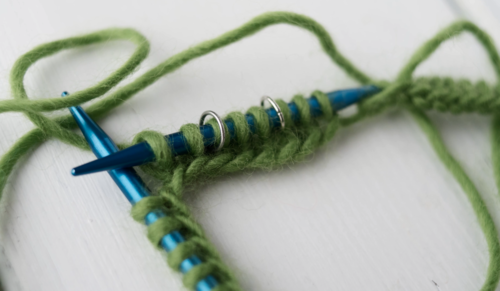
On the wrong side of your piece, starting with the stitch closest to the yarn end you're working with, push the needle under three or four stitches going up the rows.
The trick here is that you only want to stitch through the top stitches so that it won't show on the public side (right side) of your garment. Pull the yarn through so that it is taut, but not tight enough to pucker your piece. -
Move one stitch to the side and slide your needle under three to four more stitches going down the rows. You should now have made a sort of U-turn with your yarn. Pull taut.
-
Repeat once more, going up the rows to make an 'S' shape with your stitches. The more often you change directions when weaving in your ends, the less likely your ends will be to unravel with wear.
-
Carefully cut the rest of the end off close to your garment. You might have a tiny tail that still sticks out a bit, but over time the fibers will 'felt' into the surrounding stitches.
Congratulations on weaving in your ends! Now go show off that great sweater!
Learn More
Your Recently Viewed Projects
trudivickjohnson 6 890881
Jan 25, 2012
I have always just zig-zagged my yarn ends in, but this sounds like it will work just as well or even better. Thanks for the tip.
litprincesstwo 332 5344
Jan 24, 2012
this was as clear as mud. sorry as a beginning knitter I think more websites could provide clearer insstructions or photos of what their explaining.
Neen 9570472
Jan 24, 2013
Look up duplicate stitch, weaving, and reverse stockinette (all mean the same thing) because weaving in the tail with duplicate stitch on the reverse keeps the tension under the woven area the same as the rest of the fabric, while the method described here can show, on the outside, while being worn, the outline of the woven tail when the fabric is stretched. But with duplicate stitch,the tail has exactly the same stretchiness as the fabric.
Report Inappropriate Comment
Are you sure you would like to report this comment? It will be flagged for our moderators to take action.
Thank you for taking the time to improve the content on our site.

