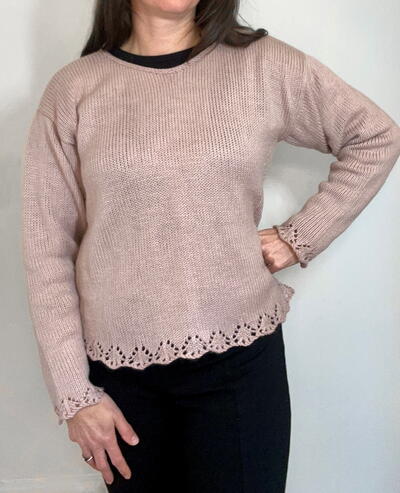
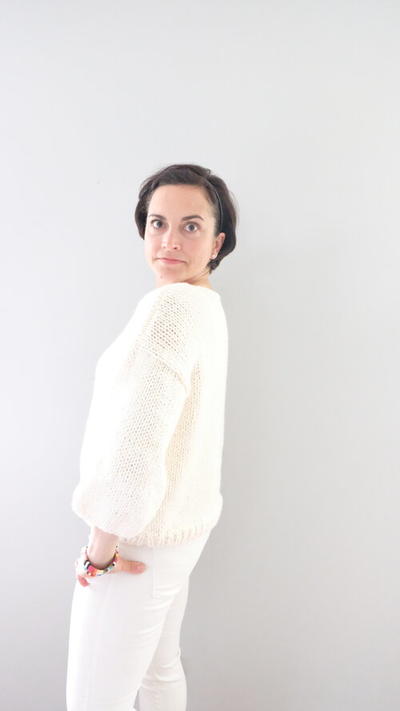
Constance Sleeveless Top

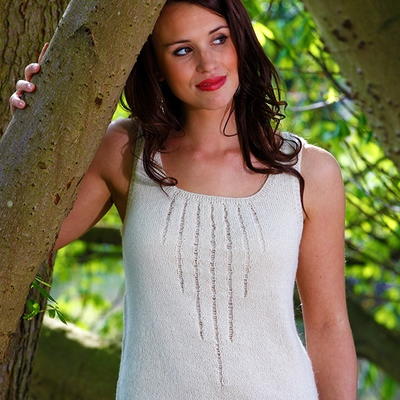
The Constance Sleeveless Top is a great way to stay cool and still look stylish. The neutral cream color and traditional design give this knit top pattern a completely versatile look. You won't be able to resist this free knitting pattern for summer. However, you can truly wear this piece all year round. During the colder months, simply layer a blazer or cardigan on top or wear it with bare arms for those warmer days. However you style this knitted tank top, you are sure to enjoy the subtle details and sturdy construction. The detail on the front of this piece really makes it stand out from the crowd.
NotesSize
To fit bust: 81, 86, 91, 97 cm, 32, 34, 36, 38 in
Actual size: 81, 86, 91, 97 cm, 32, 34, 36, 38 in
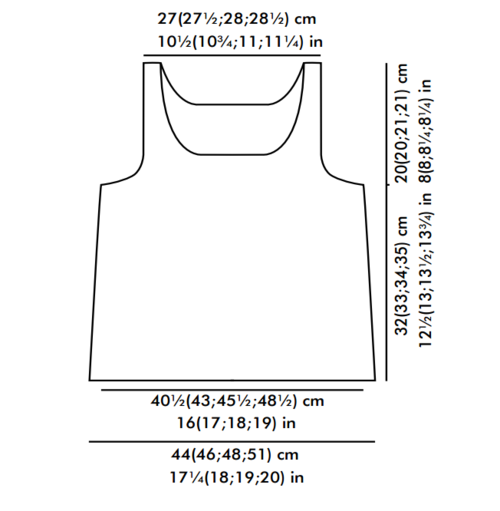
Finished length: 52, 53, 55, 56 cm, 20½, 21, 21¾, 22 in
Also check sizing diagram for actual measurements.

Knitting Needle Size2 or 2.75 mm, Circular Knitting Needles
Yarn Weight(1) Super Fine (27-32 stitches to 4 inches)
Gauge27 sts and 38 rows = 10 x 10 cm [4 x 4 in] over st st using 2.75 mm (US 2) needles. Please work swatch and check carefully. If necessary, change size of needles to obtain correct tension.
Materials List
- Artesano 4 ply Alpaca SFN10 Cream 3(4:4:4) x 50 gm (50 gm = 184 m/202 yds).
- 1 pair of 2.5 mm [US 1.5] needles
- 1 pair of 2.75 mm [US 2] needles
- Circular needle 2.5 mm/60 cm [US 1.5/23.5 in]
- Stitch holders
Pattern (ladder)
Row 1 (RS): M1 at front center, mark it with a thread.
Work 27 row.
Row 28 (RS): k until 5 sts rem to marker, M1, k11, M1, knit to end. Mark new sts. Work 27 row.
Row 55 (RS): k until 5 sts rem to marker, M1, k23, M1, knit to end. Mark new sts. Work 27 row.
Row 82 (RS): k until 5 sts rem to marker, M1, k35, M1, knit to end. Mark new sts = 7 marked sts with 5 sts between each. If you prefer unravel sts during the work be sure to M1 again in the same place.
Back
Using 2.5 mm (US 1.5) needles cast on 120(126:132:140) sts. Row 1 (WS): 1 selvedge st, *k1, p1, rep from * to last st, 1 selvedge st.
Cont in 1x1 rib for 5 rows ending with RS facing for next row. Change to 2.75 mm (US 2) needles. Beg with a K row and at the same time dec 1 st on each side within selvedge st.
Cont in st st and work straight until back meas 8 cm [3 in], ending with RS facing for next row.
Shape sides (RS): dec 1 st on each side within selvedge st. Rep dec on every foll 28th row 3 times = 110(116:122:130) sts.
Work straight until back meas 32(33:34:35) cm [12½(13:13½:13¾ in], ending with RS facing for next row.
Shape Armhole
Cast off 6(7:8:9) sts at beg of next 2 rows.
Cast off 2 sts at beg of next 2 rows 2(3:3:4) times.
Next row (RS) dec:1 selvedge st, k1, k2tog, knit until 4 sts rem, sl 1, k1, psso, k1, 1 selvedge st. Rep dec on foll 7 alt rows = 74(76:78:80) sts. Work straight until armhole meas 13(13:14:14) cm [5(5:5½:5½) in], ending with RS facing for next row.
Shape Neck
Next row (RS): knit 22(23:23:24) sts and turn, leaving rem sts on holder. Work each side of neck separately. Cast off 3 sts at beg of next and foll alt row. Work 1 row. Cast off 2 sts at beg of next row. Work 1 row. Dec 1 st on foll 5 alt row, then on 2 foll 4th rows = 7(8:8:9) sts. Work straight until armhole meas 20(20:21:21) cm [8(8:8¼:8¼ in]. Leave sts on holder, end with yarn at armhole edge. Slip centre 30(30:32:32) sts on holder. With RS facing, rejoin yarn to rem sts, knit to end. Complete to match first side, reversing shapings.
Front
Work as for back until front meas 8 cm [3 in] ending with RS facing for next row. Mark center. Begin ladder patt as described above. Cont in patt and work as for back until armhole meas 5(5:6:6) cm [2(2:2½:2½ in] ending with RS facing for next row
Shape neck
Next row (RS): knit 22(23:23:24) sts and turn, leaving rem sts on holder. Work each side of neck separately. Cast off 3 sts at beg of next row. Work 1 row. Cast off 2 sts at beg of next row. Work 1 row. Dec 1 st on foll 5 alt row, then on 3 foll 4th rows, then on 2 foll 6th rows = 7(8:8:9) sts. Work straight until armhole meas 20(20:21:21) cm [8(8:8¼:8¼ in]. Leave sts on holder, end with yarn at armhole edge. Slip centre 37(37:39:39) sts (incl. 7 sts in patt) on holder. With RS facing, rejoin yarn to rem sts, knit to end. Complete to match first side, reversing shapings.
Making Up
Knit shoulders tog. Place back and front RS facing. Place sts on larger needles. Beg at armhole and use a third larger needle to k1 st from each needle together casting off simultaneously.
Neckband
Slip holder sts on needles. With RS facing, using circular needle 2.5 mm (US 1.5), start pick up and knit 82(82:90:90) sts from back neck and 122(122:130:130) sts from front neck at the same time unravel 7 marked sts in patt back down to beg of the ladder = 204(204:220:220) sts.
Work in 1x1 rib for 4 rounds.
Cast off in rib.
Armhole borders (both alike)
With RS facing, using 2.5 mm (US 1.5) needles, pick up and knit 128(132:140:144) sts evenly all round armhole edge. Work in 1x1 rib in 4 rounds. Cast off in rib on RS. Sew side seams within selvedge st. Block the garment to correct measurements, cover with a damp cloth and let dry.
Abbreviations
- Selvedge st
- purl first st and knit last st tbl (through back of loop) on all rows
- Side inc (M1)
- Pick up horizontal loop before next stitch and knit into back of it
- M1 in pattern
- Pick up horizontal loop before next stitch and knit into front of it
- 1x1 rib
- * k1, p1, rep from * to end. Work K on K stitches and P on P stitches
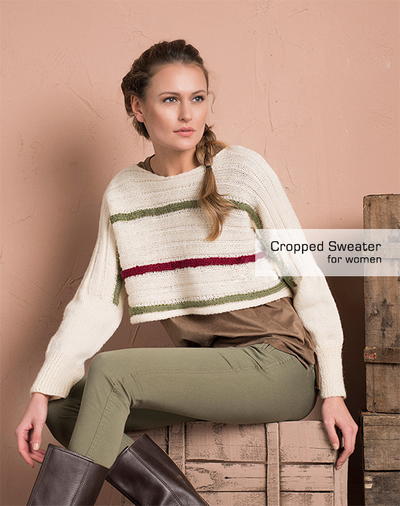
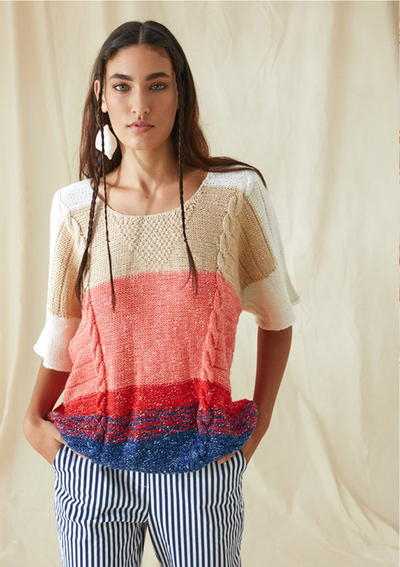
Read NextSunshine Crop Sweater
Your Recently Viewed Projects
Thanks for your comment. Don't forget to share!
achumley0003 31706 34
Sep 01, 2017
I really love the use of the dropped stitches on this top. It is always fun to do those types of patterns. The reason for doing the ladder stitch is to keep other stitches from unraveling when you finally drop the stitches. The extra m1's help to do that and also the ladder stitch pattern tells you which stitches to mark. I could see myself wearing this top all year.
puffins43 9796683
Apr 24, 2017
Does any one know if the fit measurements are accurate?
finewine1942 83895 74
Apr 23, 2018
Made this twice. Quick, relatively easy and much loved by both recipients. Will probably make it again this summer.
finewine1942 83895 74
Apr 23, 2018
I did the gauge and checked to make sure but had no problems and didn't have to make any adjustments and yes the fit was great on both.
Gracie
Apr 14, 2017
The sweater is beautiful and elegant. The color of the yarn is perfect too, especially for layering with a jacket. I would not describe this as "easy" because the ladder pattern is a little challenging as well as the shaping and needle changes. Be sure and choose a yarn that feels good next to the skin.
jmsimpson2 7193831
Jul 05, 2016
For me, the ladder definition doesn't really occur. The 27 rows are just stocking stitch, right? Nothing else after the M1?
trembl29 4597428
May 11, 2016
This pattern does not say how many stitches you CAST ON ????
dkeane 8556629
May 17, 2016
Yes it does. You need to read the whole pattern, not just that for he ladder.
KathrynAllison
May 17, 2016
Hello trembl29 4597428! The pattern states the following: Using 2.5 mm (US 1.5) needles cast on 120(126:132:140) sts. Hope this helps! -Editors of AllFreeKnitting
quanahs 5032097
Mar 28, 2016
This is a gorgeous tank and it would look lovely in a silk or rayon blend yarn which would also give amazing stitch definition to the ladder inset. Have any of you knit this sweater, what yarn did you use?
Redcatj22
May 17, 2016
I think I'm going to try it in silk or a silk blend as you suggest.I'll post a picture when it's done.
finewine1942 83895 74
Apr 23, 2018
I used a fine mercerized cotton, and it is truly beautiful according to my daughter and granddaughter.
Report Inappropriate Comment
Are you sure you would like to report this comment? It will be flagged for our moderators to take action.
Thank you for taking the time to improve the content on our site.