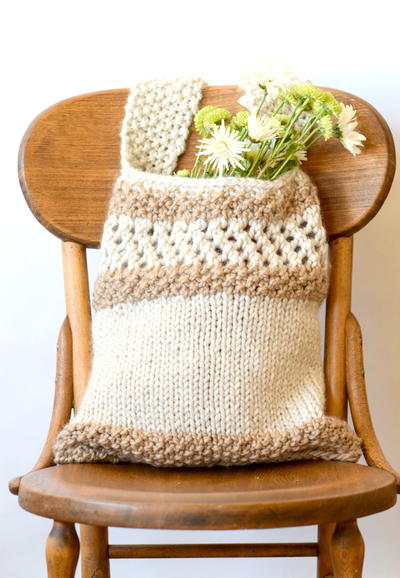
Brigitte Shopping Bag

The Brigitte Shopping Bag will quickly become your go-to bag for any sort of errand you need to run. This lace mesh bag also features a delicate pearl trim that really adds something extra to an already beautiful free knitting pattern. The next time you go to the supermarket, you can skip the paper or plastic bags and use this lovely knit tote instead. Made in a neutral cream color, you can take this knit bag anywhere and everywhere with ease. Plus, the handles are long enough to comfortable fit over your shoulder without slipping off. Get started now on this versatile free knitting pattern and you will not be disappointed.
NotesNote for beads: All beads are added after knitted sections are complete.

Knitting Needle Size2 or 2.75 mm, 3 or 3.25 mm, 8 or 5 mm
Yarn Weight(4) Medium Weight/Worsted Weight and Aran (16-20 stitches to 4 inches)
Gauge17 sts and 33 rows to 10 cm measured over lace patt using 5mm (US 8) needles and Kid Classic.
Finished SizeCompleted bag is approx 32 cm (12½ in) wide at base and approx 34 cm (13½ in) deep.
Materials List
- Kid Classic and Summerlite 4 ply - A: KCl Feather 828: 2 x 50gm, B: 4ply Still Grey 422: 1 x 50gm
- 1 pair 3mm (no 11) (US 2/3) needles
- 1 pair 5mm (no 6) (US 8) needles
- Piece of lining fabric 40cm by 70cm (15½in by 27½in)
- 1 pack of Swarovski Silver Selection 9825101-00021 (containing faux pearl beads and 5mm faceted crystal beads – 126 beads in total)
Sides (make 2)
Using 5mm (US 8) needles and yarn A cast on 55 sts.
Row 1 (RS): K1, *yfrn, P1, P3tog, P1, yon, K1, rep from * to end.
Row 2 and every foll alt: K1, P to last st, K1.
Row 3: K2, yfwd, sl 1, K2tog, psso, yfwd, *K3, yfwd, sl 1, K2tog, psso, yfwd, rep from * to last 2 sts, K2.
Row 5: K2tog, P1, yon, K1, yfrn, P1, *P3tog, P1, yon, K1, yfrn, P1, rep from * to last 2 sts, sl 1, K1, psso.
Row 7: K2tog, yfwd, K3, yfwd, *sl 1, K2tog, psso, yfwd, K3, yfwd, rep from * to last 2 sts, sl 1, K1, psso.
Row 8: As row 2.
These 8 rows form lace patt.
Cont in lace patt until work meas 30 cm, dec 1 st at centre of last row and ending with RS facing for next row. 54 sts.
Now work in border patt as folls:
Row 1 (RS): K2tog tbl but leave 2nd of these 2 sts on left needle (thereby only dropping first of these 2 sts off needle), *K2tog tbl (this is st left on left needle from last “K2tog tbl” and next st) but leave 2nd of these 2 sts on left needle (thereby only dropping first of these 2 sts off needle), rep from * to end – one st still on left needle, K this st tbl.
Row 2: P2tog but leave 2nd of these 2 sts on left needle (thereby only dropping first of these 2 sts off needle), *P2tog (this is st left on left needle from last “P2tog” and next st) but leave 2nd of these 2 sts on left needle (thereby only dropping first of these 2 sts off needle), rep from * to end – one st still on left needle, P this st.
These 2 rows form border patt.
Completing work in border patt, cont as folls:
Work 6 rows, ending with RS facing for next row.
Break off yarn A and join in yarn B.
Change to 3mm (US 2/3) needles.
Work in border patt for 5 rows, ending with WS facing for next row.
Cast off.
Handles (make 2)
Using 3mm (US 2/3) needles and yarn B cast on 162 sts.
Beg with row 1, work in border patt as given for sides for 8 rows, ending with RS facing for next row.
Cast off.
Making Up
Press as described on the information page.
From lining fabric, cut two pieces same size as side sections, adding seam allowance along side and lower edges.
Mark points along row-end edges of knitted side sections 10 cm below cast-off edges. Join sides along row-end and cast-on edges, leaving row-end edges open above marked points.
On side sections, attach beads as in photograph – use the darker, larger beads at the top and the smaller, lighter beads lower down. Join side and lower edges of lining pieces in same way as knitted side sections. Slip lining inside knitted side pieces, and then fold under raw edges along open row-end edges and across top – folded edge of lining should “sit” level with beg of border patt. Neatly sew lining in place.
Fold each handle strip in half and join cast-on and cast-off edges to form a long thin tube, leaving approx 4 cm open at each end. Using photograph as a guide, wrap open ends of handles around top corners of sides and securely sew in place.
Up Next:
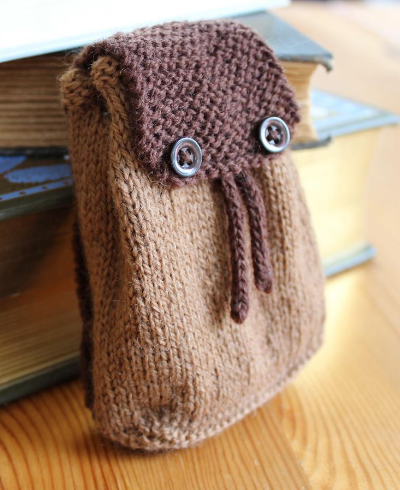
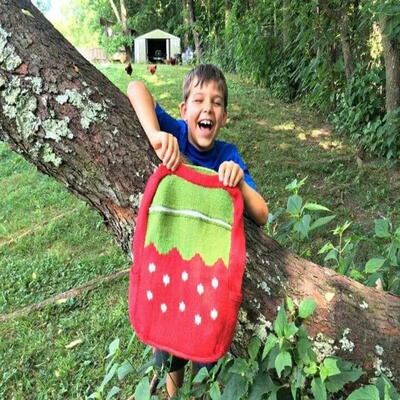
Read NextSweet Strawberry Backpack
Your Recently Viewed Projects
Thanks for your comment. Don't forget to share!
hopetou2003 880425 5
Oct 28, 2017
This pattern is anything but easy. Abbreviations take research before you can start, the body became easier after several tries but the handles are torture.
Sue What
Apr 27, 2017
Whether you call it a market bag, tote bag, or purse, I really like this bag. I think for a tote bag I will leave the beads off, but with them on, I think it would be fancy enough to call it a purse. Does anyone else think this would make a versatile summer purse?
bkick1
Mar 31, 2017
This is the first time that I would like to print a pattern on this site, but I don't see a print button. Could someone please walk me through this process. Please and thank you.
KLC
Mar 31, 2017
Hello! We apologize, the print button was missing for this project. I have added it, so you can now find the print button directly under the project name and byline up at the top of this page. Thanks! -Krista, Editor
jobers77
Feb 23, 2017
Very convenient and also great for the environment because it cuts down on needing a plastic bag from the store. It looks very Bohemian,too, I love the natural color. Only one question- What does YFRN and YFWD stand for? I haven't seen those before. My guess is Yarn front and Yarn Wrong side??
3cats2love
Feb 26, 2017
Hi jobers77, the abbreviations yfrn and yfwd refer to special ways of making eyelets in the knitting. When the eyelet is worked between 2 knit stitches it is called Yarn forward (yfwd). When worked between a knit then a purl stitch it is called Yarn forward and round needle (yfrn). Which makes me think this shouldn't be labeled an easy pattern since those are a little more advanced techniques.
Lisa
Mar 25, 2017
YFWD yarn forward A YFWD is a YO between two knit stitches After your knit stitch your yarn is behind the needles Bring the yarn forward between the needles and then knit the next stitch YRN yarn round needle The YRN is a YO done between two purl stitches Purl one stitch and youll find your yarn is in front bring the yarn all the way around the needle until it is back in front again and then purl your next stitch YON yarn over needle The YON is a YO done after a purl and before a knit stitch Purl one stitch and your yarn will be in front bring it back so it is behind the needle and then knit the next stitch YFRN yarn forward round needle The YFRN is a YO done after a knit and before a purl stitch After you knit your stitch the yarn…Read More will be behind your needles Bring the yarn forward and then all the way around the needle until it is in front again before purling the next stitch
Susan S
Dec 23, 2016
Very fancy with the beads. I like that they are added on and not knitted in, because you could leave them off if you wanted a less fancy bag.
paver2
Dec 21, 2016
I want this. I NEED this! It's a beauty for a bag, that's for sure. Wish I had come across this earlier, I would have made at least one for a Christmas gift. The only thing I would change would be to make the handles a little longer so the bag would be easier to get into when I was carrying it. I can't see where this would be a problem, would it?
Mkinthegarden 0782 413
Apr 28, 2016
Does anyone know why they change to yarn B? I don't see a change in the picture or a second yarn mentioned in the supplies. Thank you!
ladychristinejewel l 4560066
Apr 28, 2016
I think the handles are worked in a different colour but personally I would use the same colour as the main bag.
Lisa
May 30, 2016
There are two yarns listed in the supply section of the pattern kid classic and summerlite. The bag is knit in kid classic and the handles are knit in summerlite, the kid classic is a worsted /aran weight yarn and summlite is fingering weight, it can be presumed from the pattern that smaller yarn and smaller needles will make sturdier handles that will hold their shape for a long time, more so in this case because the yarns are different fibres. Hope this helps someone. Happy knitting
Report Inappropriate Comment
Are you sure you would like to report this comment? It will be flagged for our moderators to take action.
Thank you for taking the time to improve the content on our site.