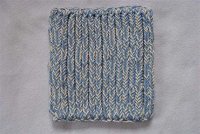
Blue Blocks Placemat

This easy knitted placemat pattern is perfect for Thanksgiving. Knit this Blue Blocks Placemat to add to your Thanksgiving table decor. No matter what the color scheme, these placemats will look gorgeous with your dishes. Knit simple squares in whatever color you desire and stitch them all together. Thanksgiving is all about the dinner table. Give everyone something to admire before they start drooling over the turkey. Your family will love these knitted placemats. They won't believe you made them yourself!

Knitting Needle Size7 or 4.5 mm
Yarn Weight(4) Medium Weight/Worsted Weight and Aran (16-20 stitches to 4 inches)
Gauge19 stitches and 32 rows = 4 inches [10 centimeters] in garter stitch
Finished SizeApproximately 24 x 16 inches [61 x 40.5 centimeters]
Materials List
-
Lily® Sugar’n Cream® (Solids: 70.9 g/2.5 oz; 109 m/120 yds)
- Contrast A 01114 (Indigo) - 2 balls
- Contrast B 01116 (Blue Jeans) - 2 balls
- Contrast C 01118 (Stonewash) - 2 balls
- (Optional Trim) Contrast D 01130 (Warm Brown) - 1 ball
- Size 4.5 mm (U.S. 7) knitting needles or size needed to obtain gauge
- Large eye blunt-ended needle
Instructions
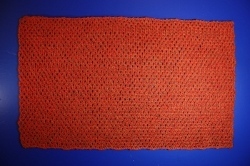
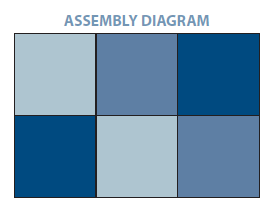
Make 6 squares, 2 each in Contrast A, B, and C.
Square
Cast on 38 stitches.
-
Casting On
Make a slip knot: Loop the yarn as shown and slip needle under the lower strand of the loop. Reach through the loop you just made and pull up a loop of yarn. Pull the yarn end attached to the ball of yarn to tighten the slip knot leaving the other end approx 4 ins [10 cm] long.
Transfer needle to left hand. Insert the right-hand needle through slip knot and wind yarn over right-hand needle. Pull loop through slip knot. Place new loop on left-hand needle. (You now have 2 stitches (sts) on your left-hand needle). Insert right-hand needle between last 2 stitches (sts) on left-hand needle and wind yarn over right-hand needle. Pull loop through. Place this new loop on left-hand needle beside last stitch (st). (You now have 1 more stitch on left-hand needle). Repeat (rep) steps 5 and 6 until required number of stitches (sts) have been cast on left-hand needle. -
1st row: (Wrong side). Knit.
2nd row: (Right side). Knit. -
The Knit Stitch
Hold the needle with cast on stitches (sts) in your left hand, and the loose yarn attached to the ball at the back of work. Insert right-hand needle from left to right through the front of the first stitch (st) on the lefthand needle. Wind the yarn from left to right over the point of the right-hand needle. Draw the yarn through this original stitch (st) which forms a new stitch (st) on right-hand needle. Slip the original stitch (st) off the left-hand needle, keeping the new stitch (st) on the right-hand needle.
To knit a row, repeat steps 1 to 4 until all stitches (sts) have been transferred from left-hand needle to right-hand needle. Turn the work by transferring the needle with stitches (sts) into your left hand to knit the next row.
Repeat these 2 rows for garter stitch pattern. Continue in pattern as established until work from beginning measures 8 inches [20.5 centimeters], ending with a Right side (2nd) row.
Cast off knitwise (Wrong side). -
Casting Off
Knit the first 2 stitches (sts). *Using left-hand needle, lift first stitch (st) over second stitch (st) and drop it off between points of the 2 needles. Knit the next stitch (st); repeat (rep) from * until all stitches (sts) from left-hand needle have been worked and only 1 stitch (st) remains on the right-hand needle. Cut yarn (leaving enough to sew in end) and thread cut end through stitch (st) on needle. Draw yarn up firmly to fasten off last stitch (st).
Weave in ends. -
Weaving in Ends
What do you do with those dangling ends at the sides of your work? Never cut without darning them in first because they will not be secure and your knitting could easily unravel. Thread each end onto a blunt ended large eye needle and make small alternating stitches into the side of your work taking care not to pull too tightly.
After you’ve worked up in one direction about 2 inches [5 cm] turn and work backwards alternating over the spaces you just worked. Now you can safely cut the end. -
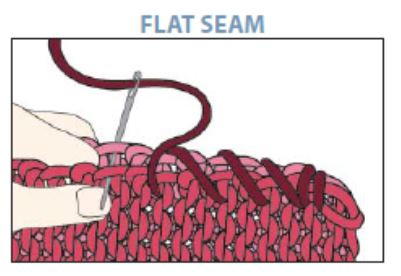
Finishing
Sew Squares together usi
ng a flat seam as shown in Diagram.
Abbreviations
- RS
- Right Side
- St(s)
- Stitch(es)
- WS
- Wrong Side
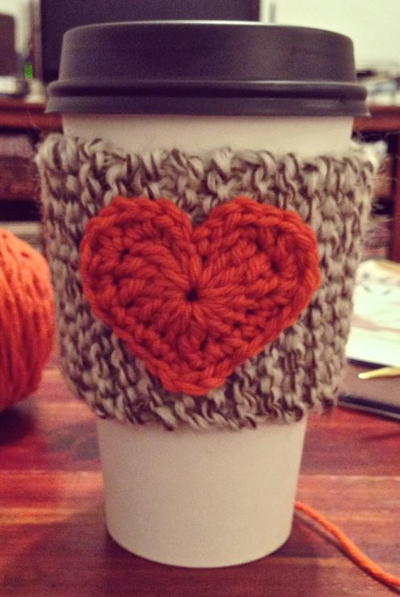
Read NextDouble Seed Stitch Coffee Cozy
Your Recently Viewed Projects
Thanks for your comment. Don't forget to share!
3cats2love
Apr 24, 2017
I like the garter stitch and color blocks for this place mat. I don't like sewing blocks together, so I would be tempted to knit it as two pieces, three blocks each, then seam it together down the middle. I like that it is cotton so it will wash easily. I could see this being made in coordinating colors for any season.
The Designing Peng uin
Jul 19, 2016
Another of those patterns that makes me wonder why I didn't think of it myself - forever looking for place mats that co-ordinate with the colours in the dining room and with the carefully gathered primitive Canadiana in the room. The knit texture and the yarn will be a perfect choice while the project itself is one that can be picked up when the time is right - too much of that knit coat or that heavy sweater? then work on a place mat or on several blocks of one colour for an hour or so
Report Inappropriate Comment
Are you sure you would like to report this comment? It will be flagged for our moderators to take action.
Thank you for taking the time to improve the content on our site.