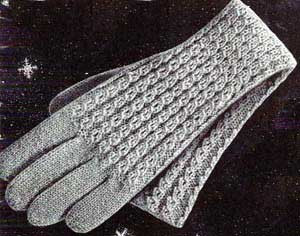
Atelier Gloves

Dress up with the elegant Atelier Gloves. A lace pattern on the back of the glove and around the cuffs makes these gloves perfect for any time you want to look a little dressy. The textured cuffs combine simple lace with raised purl stitches to create an attractive, noteworthy pair of gloves. For autumn and early spring, this delightful pattern has everything you could ask for. You will want to wear these gloves everywhere once you bind off.

Knitting Needle Size5 or 3.75 mm, Double-Pointed Knitting Needles (DPNs)
Yarn Weight(3) Light/DK (21-24 stitches to 4 inches)
SIZE: Medium
Finished Length 12 in. (30.5 cm)
Finished Circumference 8 in. (20.5 cm) around upper hand
MATERIALS
- 483-173 Lion Brand LB Collection Cashmere: Sprout, 3 Balls
- Lion Brand Double-Pointed Needles - Size 5
- Lion Brand Stitch Holders
- Lion Brand Split Ring Stitch Markers
- Large-Eye Blunt Needles (Set of 6)
GAUGE:
25 sts + 23 rows = 4 in. (10 cm) in St st (k on RS, p on WS).
BE SURE TO CHECK YOUR GAUGE. When you match the gauge in a pattern, your project will be the size specified in the pattern and the materials specified in the pattern will be sufficient. If it takes you less stitches and rows to make a 4 in. [10 cm] square, try using a smaller size hook or needles; if more stitches and rows, try a larger size hook or needles.
STITCH EXPLANATION:
kfb (knit in front and back) Knit next st without removing it from left needle, then k through back of same st – 1 st increased.
m1 (make 1) An increase worked by lifting horizontal thread lying between needles and placing it onto left needle. Knit this new stitch through the back loop.
mb (make bobble) (K1, p1, k1, p1, k1) all in same stitch to make 5 stitches from one, then pass 2nd, 3rd, 4th, and 5th sts, one at a time, over first stitch.
skp Slip 1 as if to knit, knit 1, pass slip stitch over knit stitch – 1 st decreased.
sk2p Slip 1 as if to knit, knit 2 together, pass slipped stitch over – 2 sts decreased.
NOTES
1. Gloves are worked in rounds from the cuff to the fingers. Stitches are worked separately in rounds for each finger and thumb.
2. Pattern stitches, used when working the cuff and back of hand, are shown in row-by-row written instructions and in charts before the instructions for the Gloves begin. Work from
the written instructions or from the charts (or, refer to both!), whichever you prefer.
3. The cuff is worked in the Leaf Cuff pattern. The Flower Motif pattern is worked across the back of the hand at the same time as sts are increased on one side of the glove for the
thumb gusset. The thumb gusset uses increased stitches to create additional room in the Glove.
4. The thumb sts are placed on a holder and the hand is worked for additional rounds before the sts are divided for fingers.
5. The little finger is worked in rnds over 12 hand sts and 1 cast on st, on the opposite side of the Glove from the thumb sts. The remaining 40 sts are placed on a holder for upper
hand.
6. The stitches for the ring, middle, and index fingers are placed back onto the needles, one finger at a time, and worked in rnds. For some fingers, additional sts are picked up or cast
on.
7. Thumb sts are placed back onto needles and worked in rnds.
8. Any gaps remaining between fingers will be closed when gloves are finished.
PATTERN STITCHES
Leaf Cuff (worked in the rnd)
Notes
1. Leaf Cuff pattern is a lace pattern, worked over a rep of 14 sts + 3 sts. The 14-st rep will be worked twice across each row. Count your sts at the end of each row – you should always have 45 sts.
2. Leaf Cuff pattern can be worked from chart or from written instructions below.
Rnd 1 (RS): K2, *yo, p5, p3tog, p5, yo, k1; rep from * to last st, k1.
Rnd 2 and all even rnds (WS): Knit.
Rnds 3–12: Rep last 2 rnds 5 more times.
Rnd 13: K2, *yo, skp, yo, p3, p3tog, p3, yo, k2tog, yo, k1; rep from * to last st, k1.
Rnd 15: K2, *yo, k1, skp, yo, p2, p3tog, p2, yo, k2tog, k1, yo, k1; rep from * to last st, k1.
Rnd 17: K2, *yo, k2, skp, yo, p1, p3tog, p1, yo, k2tog, k2, yo, k1; rep from * to last st, k1.
Rnd 19: K2, *yo, k3, skp, yo, p3tog, yo, k2tog, k3, yo, k1; rep from * to last st, k1.
Rnd 21: K2, *k3, k2tog, yo, k3, yo, skp, k4; rep from * to last st, k1.
Rnd 23: K2, *k2, k2tog, yo, k5, yo, skp, k3; rep from * to last st, k1.
Rnd 25: K2, *k1, k2tog, yo, k7, yo, skp, k2; rep from * to last st, k1.
Rnd 27: K2, *k2tog, yo, k9, yo, skp, k1; rep from * to last st, k1.
Rnd 29: K1, k2tog, yo, k11, yo, *sk2p, yo, k11, yo; rep from * to last 3 sts, skp, k1.
Rnd 30: Knit.
Flower Motif (worked in the rnd)
Note: Flower Motif pattern can be worked from chart OR from written instructions below.
Rnd 1 (RS): K4, k2tog, yo, k1, yo, skp, k4.
Rnd 2 and all even rnds (WS): Knit.
Rnd 3: K3, k2tog, yo, k3, yo, skp, k3.
Rnd 5: K2, (k2tog, yo) twice, k1, (yo, skp) twice, k2.
Rnd 7: K1, (k2tog, yo) twice, k3, (yo, skp) twice, k1.
Rnd 9: (K2tog, yo) 3 times, k1, (yo, skp) 3 times.
Rnd 11: Rep Rnd 7.
Rnd 13: K2, k2tog, yo, k5, yo, skp, k2.
Rnd 15: K1, k2tog, yo, k1, yo, skp, k1, k2tog, yo, k1, yo, skp, k1.
Rnd 17: K2tog, yo, k1, mb, k1, yo, sk2p, yo, k1, mb, k1, yo, skp.
Rnd 19: K6, mb, k6.
Rnd 20: Knit.
INSTRUCTIONS
RIGHT GLOVE
Cuff
Cast on 45 sts. Divide sts onto double pointed needles, place marker for beg of rnd and join, being careful not to twist sts. Work Rnds 1-30 of Leaf Cuff pattern.
Next Rnd: Knit.
Next Rnd: Purl.
Next Rnd: (K4, kfb) 8 times, k5 – 53 sts at the end of this rnd.
Shape Thumb Gusset
Note: On the first rnd of gusset shaping, you are instructed to place 2 markers. These markers are the gusset markers, and are in addition to the beg of rnd marker.
Next (Inc) Rnd: K26, place gusset marker (pm), m1, k1, m1, pm (for end of gusset), knit to end – 55 sts at end of this rnd (3 sts between markers).
Next Rnd: Knit.
Next (Inc) Rnd: K4, work Rnd 1 of Flower Motif over next 13 sts, knit to first gusset marker, sl marker (sm), m1, k to next gusset marker, m1, sm, knit to end – 57 sts at end of this rnd (5 sts between gusset markers).
Next 2 Rnds: K4, work next rnd of Flower Motif over next 13 sts, knit to end.
Next (Inc) Rnd: K4, work next rnd of Flower Motif over next 13 sts, knit to first gusset marker, sl marker (sm), m1, k to next gusset marker, m1, sm, knit to end – 59 sts at the end of this rnd (7 sts between gusset markers).
Rep last 3 rnds 5 more times – 69 sts (17 sts between gusset markers) when all incs have been made.
Next Rnd: K4, work last rnd of Flower Motif over next 13 sts, knit to first gusset marker, remove marker, place 17 gusset sts between markers on holder for Thumb, remove second gusset marker, knit to end – 52 sts at the end of this rnd.
Next 3 Rnds: Knit. Work proceeds one finger at a time, leaving rem sts to be worked later.
Little Finger
Rnd 1: K6, place next 40 sts on holder for hand, cast on 1 st, k6, place marker for beg of rnd, join – 13 sts for little finger.
Rnd 2: Knit. Rep Rnd 2 until little finger measures about 1 3/4 in. (4.5 cm), or desired length.
Next Rnd: (K2tog) 5 times, k3tog – 6 sts. Cut yarn, leaving a long tail. Thread tail through rem sts and pull to gather. Knot securely.
Upper Hand
Slip hand sts from holder back onto double pointed needles.
Next 2 Rnds: Knit.
Ring Finger
Rnd 1: K7, place next 26 sts on holder for rem fingers, cast on 1 st over gap, k7, place marker for beg of rnd, join – 15 sts for ring finger.
Rnd 2: Knit. Rep Rnd 2 until ring finger measures about 2 1/4 in. (5.5 cm), or desired length.
Next Rnd: (K2tog) 6 times, k3tog – 7 sts. Cut yarn, leaving a long tail. Thread tail through rem sts and pull to gather. Knot securely.
Middle Finger
Slip rem finger sts from holder back onto double pointed needles.
Rnd 1: K6, place next 14 sts on holder for index finger, cast on 2 sts, k6, pick up and knit 2 sts along cast-on edge of ring finger, place marker for beg of rnd, join – 16 sts for middle finger.
Rnd 2: Knit. Rep Rnd 2 until middle finger measures about 2 1/2 in. (6.5 cm), or desired length.
Next Rnd: (K2tog) 8 times – 8 sts. Cut yarn, leaving a long tail. Thread tail through rem sts and pull to gather. Knot securely.
Index Finger
Slip index finger sts from holder back onto double pointed needles.
Rnd 1: K14, pick up and knit 1 st along cast-on edge of middle finger, place marker for beg of rnd, join – 15 sts for index finger.
Rnd 2: Knit. Rep Rnd 2 until index finger measures about 2 1/4 in. (5.5 cm), or desired length.
Next Rnd: (K2tog) 6 times, k3tog – 7 sts. Cut yarn, leaving a long tail. Thread tail through rem sts and pull to gather. Knot securely.
Thumb
Slip thumb sts from holder back onto double pointed needles.
Rnd 1: K17, place marker for beg of rnd, join – 17 sts for thumb.
Rnd 2: Knit. Rep Rnd 2 until thumb measures about 1 1/2 in. (4 cm), or desired length.
Next Rnd: (K2tog) 7 times, k3tog – 8 sts. Cut yarn, leaving a long tail. Thread tail through rem sts and pull to gather. Knot securely.
LEFT GLOVE
Work as for Right Glove to Gusset Shaping.
Shape Thumb Gusset
Next (Inc) Rnd: K26, place gusset marker (pm), m1, k1, m1, pm (for end of gusset), knit to end – 55 sts at the end of this rnd (3 sts between gusset markers).
Next Rnd: Knit.
Next (Inc) Rnd: Knit to first gusset marker, sl marker (sm), m1, k to next gusset marker, m1, sm, k9, work rnd 1 of Flower Motif over next 13 sts, knit to end – 57 sts at the end of this rnd (5 sts between gusset markers).
Next 2 Rnds: K to last 17 sts, work next rnd of Flower Motif over next 13 sts, knit to end.
Next (Inc) Rnd: Knit to first gusset marker, sl marker (sm), m1, k to next gusset marker, m1, sm, k9, work next rnd of Flower Motif over next 13 sts, knit to end – 59 sts at the end of this rnd (7 sts between gusset markers). Rep last 3 rnds 5 more times – 69 sts (17 sts between gusset markers) when all incs have been made.
Next Rnd: Knit to first gusset marker, place 17 gusset sts between markers on holder for thumb, remove second gusset marker, k9, work last rnd of Flower Motif over next 13 sts, knit to end – 52 sts at the end of this rnd.
Next 4 Rnds: Knit. Complete as for Right Glove.
FINISHING
Thread yarn ends into blunt needle and sew any gaps at base of fingers and thumb closed. Weave in any remaining ends.
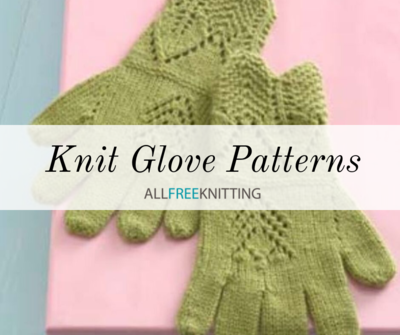
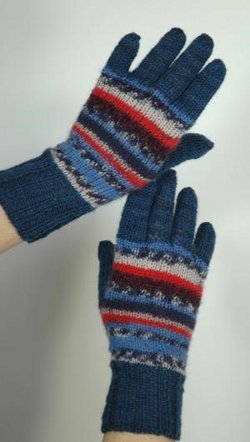
Read Next8 Knit Glove Patterns
Your Recently Viewed Projects
Thanks for your comment. Don't forget to share!
Report Inappropriate Comment
Are you sure you would like to report this comment? It will be flagged for our moderators to take action.
Thank you for taking the time to improve the content on our site.